
Yup. That about sums it up.
I wish I had been the one to come up with this graphic, or that I could track down who did, because I think we could be besties, but it was one of those bad pins on Pinterest that goes nowhere.
This time of year don't bother calling. I'm in the garden. And I'm not taking calls. Visitors, yes. Calls, no way man.
Our local "Frost Date" is anticipated around here like Christmas. By me if not by everyone else. But even before it is "safe" to be planting out tender seedlings, I find plenty to do in the garden. Like creating a natural play space for my Personal Assistant. And setting up my portable greenhouse for seed starting, and constructing a fence/tomato cages to keep the Personal Assistant from sliding down the hill and over the wall.
It actually came it pretty great and cost a fraction of a regular fence. I think it would be perfect if you need a fence around the veggie garden for keeping critters out. The blow by blow is after the jump.

Nothing in Pittsburgh is flat, including my back yard. There is a little bit of flat yard for playing in, but you have to go upstairs to get to it. The Personal Assistant has discovered running, or as he likes to call it "going fast". It was giving me nightmares, but shelling out a grand or more for fencing it off what not exactly an option. But I did have a roll of welded wire hanging around, and some garden stakes, and some wire ties and needed some raised beds and cages for my 72 tomato starts. (Yes, 72. I *may* have been a little excited. If you are a neighbor reading this, please, please come pick some up. I hate to throw them out.) After fretting about this fence issue since, before he was born, one morning I just woke up to a solution.
Drum roll please...
TOMATO CAGE FENCE!
It was cheap, fast and easy. In other words, perfect.
All I needed to buy was a few extra stakes, some peat moss, and straw and I was in business.
First, I counted to thirty squares, just because it felt right, cut the welded wire, and made large hoops buy folding the open end around the closed end.

Then I spaced and staked these out along the fence line. Next I cut pieces of welded wire to fit between the hoops, these had two open ends which were then folded around the hoops. I secured the flat portions and the hoop portions to the stakes with black wire ties to keep it all together and grounded. Otherwise, even The Personal Assistant could lift the fence.

Then the filling began...
Dump some straw in one of the hoops, and stir it with a stake to make a nest for your soil.

I used my own compost mixed with peat moss. I had to carry it up the stairs bucket by bucket. This was the most time consuming part. If the yard was flat, I could have just wheeled the wheelbarrow next to the cage and shoveled the soil mix in. But if my yard was flat, you would not be enjoying this lovely tutorial. So there's that.
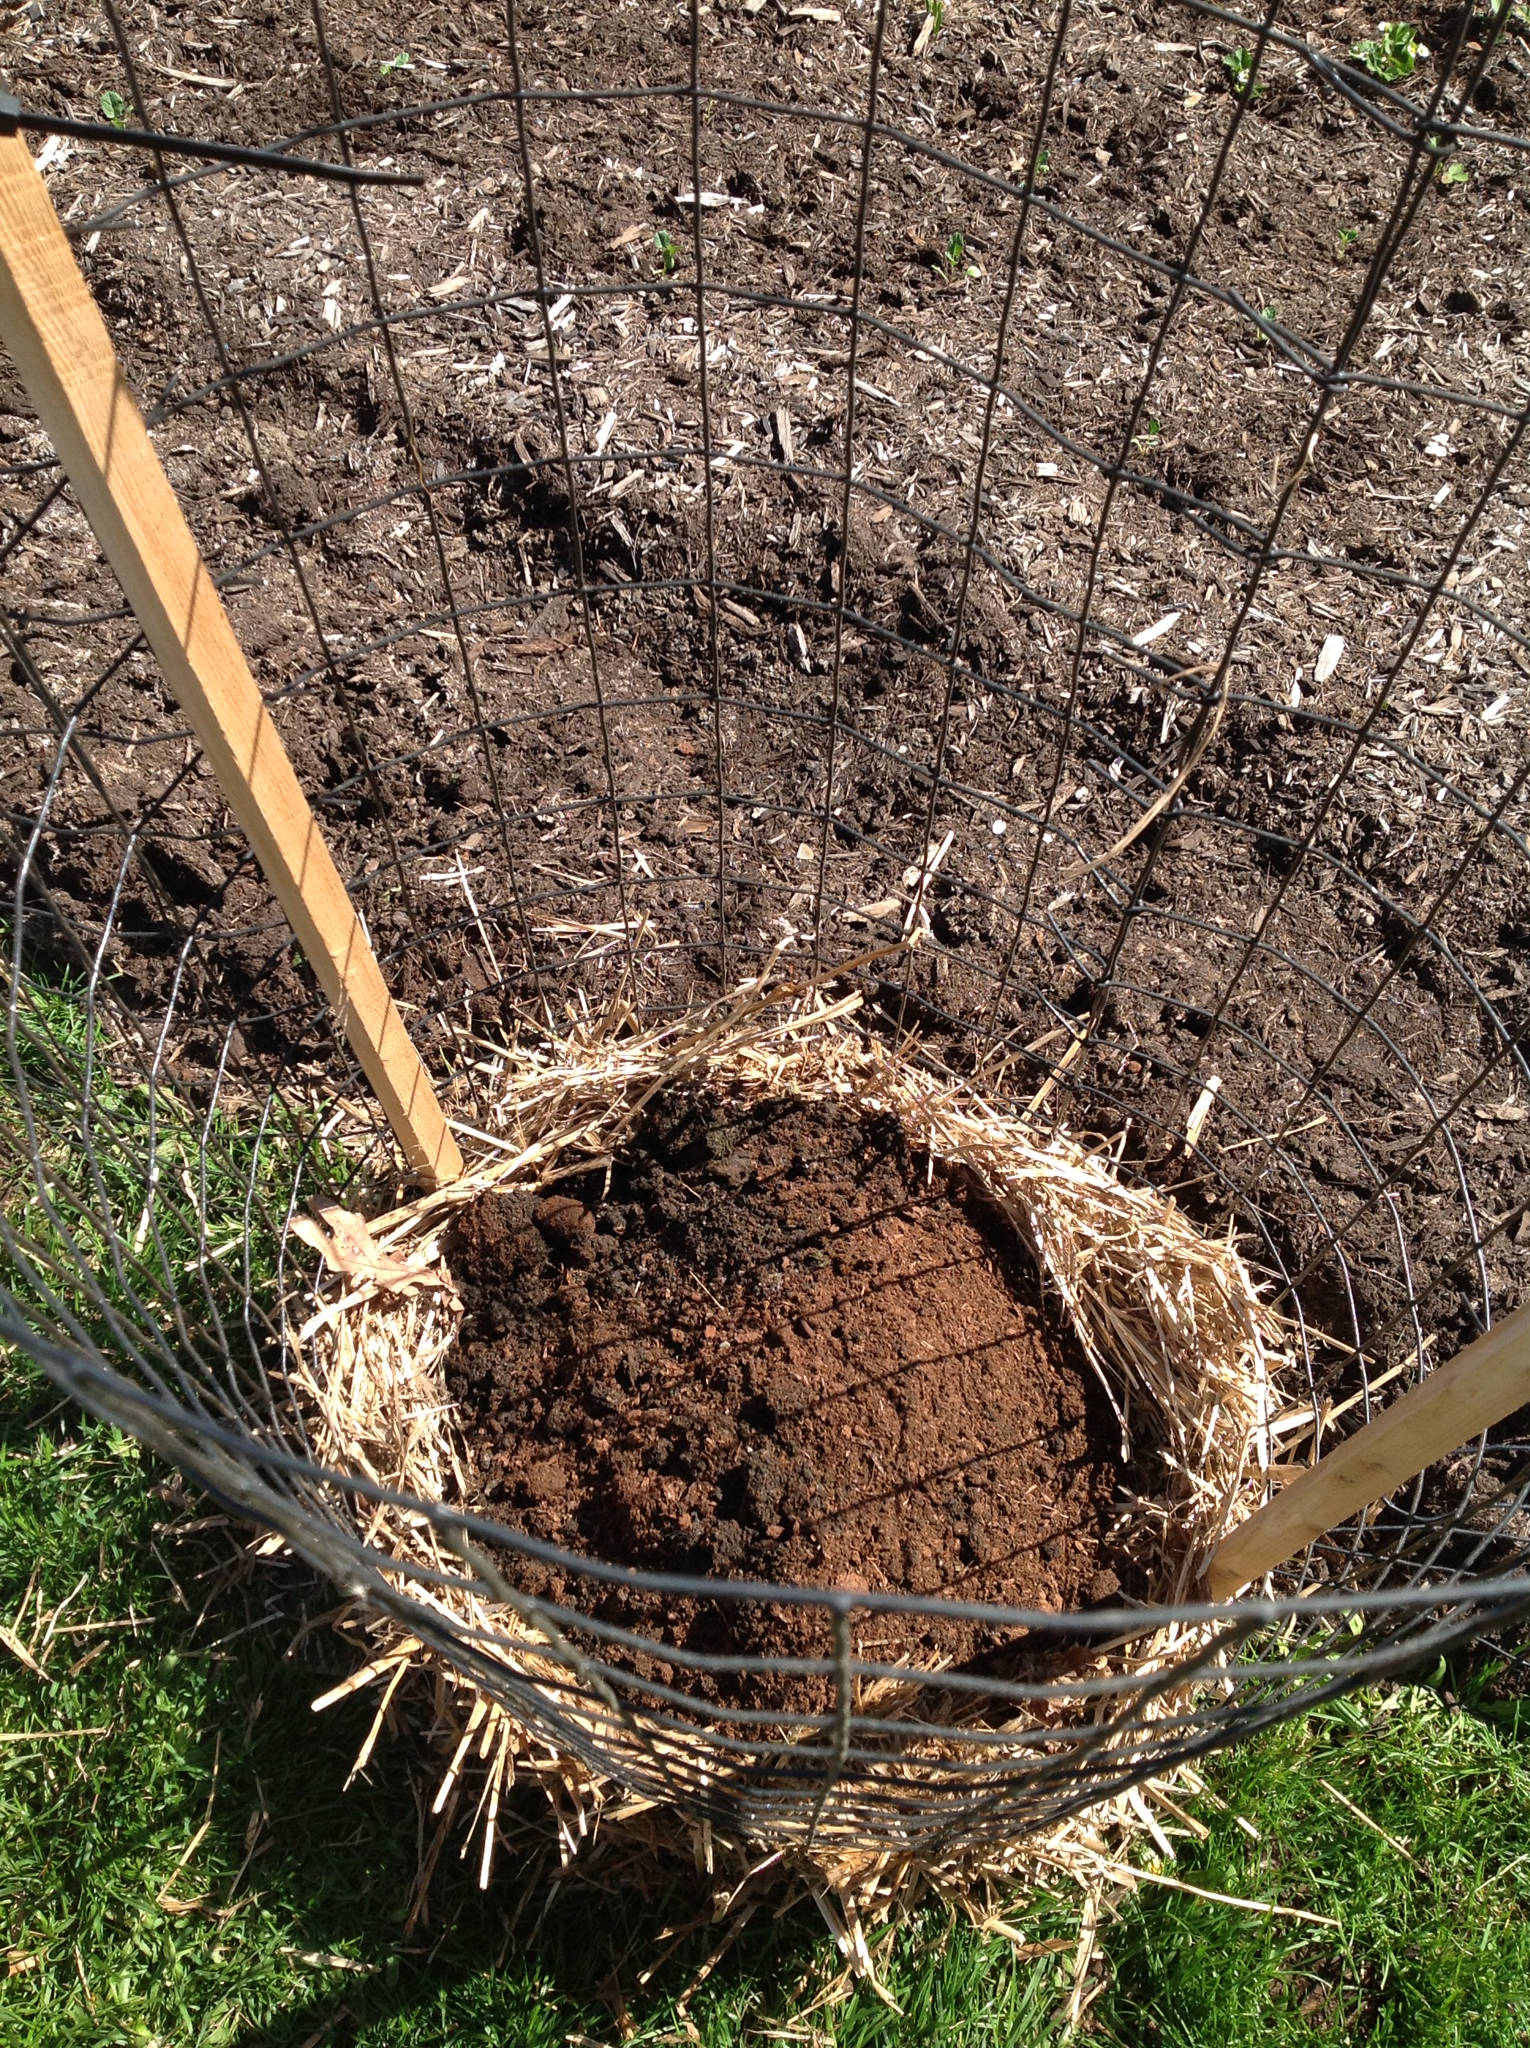
Keep filling by making the next layer of nest, then adding soil until you are nearly half full. I suggest using a tarp under the straw bale and mixing area to minimize the mess and clean up.

Once the bins were almost half full, I added an empty milk or soda jug with holes. (Keep the lids on to keep the dirt and bugs out.) The jugs will help with the watering in the hot summer months. Just fill the jugs and the water will slowly seep out.

I buried the jugs 3/4 of the way, then planted my tomato starts up to the bottom leaves. As they grow, I will continue to add soil until only the top of the jug is visible. This encourages the plants to grow more lateral roots, creating stronger healthier tomato plants.

This is the finished project. The empty part of the hoop will act as the tomato cage as the plants grow. I planted sunflowers and cucumbers behind the fence so it should be covered in green by the end of the summer if all goes well. I am thinking it would be nice to add some plants to the side of the bins as well.

Here's the math:
- Welded wire 36", had, otherwise $50
- Wire ties, had, otherwise $2
- Stakes $2 ea, 2 per hoop
- Straw bale $9
- Peat Moss, $10
Total: $35 for me, $87 for you
There were plenty of supplies for more fencing, the only thing I ran out of was the welded wire. I am debating whether or not to make a matching fence on the other side of the yard. I would do it again, I am just not sure I need it away from the play area.
Happy frost free gardening to you, and please send pictures if you try the tomato cage fence!
Jen
finaly! i have waiting! lol
ReplyDeleteLove the post. Novice gardener here. Can you explain why you created the nest? Interesting concept and I am considering trying tomato plant with this method.
ReplyDeleteThanks! The straw keeps the soil mix in the cage. It is just a cheap way to make a really small raised bed for one or two plants.
Delete